DIY Simple and Non-Zipper Pillow Case


Making simple pillow case is very easy,it's a DIY craft or do it your self procedure.. You just have to learn the basics in sewing. This project is for 23x16 pillow size. I always use satin fabrics for my pillows because satin won't tangle my hair during sleep but it's up to you whatever fabric you want to make as pillow case.This procedure is very simple, all you need to do is provide the fabric which is 53 inches tall and 18 inches wide. You can use a recycled cloth for this project, all you just have to  attach the pieces of recycled cloth then sew to make a 53 inches tall fabric then follow the step by step in making a simple pillow case.


diy procedure pillow case
Procedure to sew a pillow case:

  • Measure the fabric at 53x18 inches
  • fold both ends two times with 1/2 inch each fold then sew
  • Fold the first fold on the image, this will serve as the holder of the pillow since we don't use a zipper here.
  • Make the second fold as you see on the third image.
  • sew the both edges
  • make sure to measure every fold correctly
  • Now we're done with the simple pillow case
This is a simple pillow case, simple because we did not put so much design and this pillow case has no zipper. We only fold 6 inches to hold the pillow inside the case.

DIY bed sheets


Learning how to sew has so many advantages. As a mom whose budgeting means so much, I always seek for alternative ways on how to save money when buying house hold's stuff. When i learned to sew, I saved 50 % on my budget. I learned the DIY procedure of pot holder, kiddie dress and bags from used clothes and now i learned how to make bed sheets. I enjoyed sewing bed sheets, I can choose any color and any types of fabric.  Gladly I found the best and cheapest fabrics store nearby. 
Doing this project, you have to prepare the following materials:
  • bed sheet fabric
  • scissor
  • tape measure
  • sewing machine
  • needle and string
The procedure in making a bed sheet is so easy when you follow the instructions right. First you have to choose a fabric, you can buy it from the fabric store. In the Philippines, all kinds of fabrics will be found in Divisoria but in my place, I buy fabrics in mang Tino's store at UPLB his price is the same as divisoria's.

This project is designed for bed size of 60x 75 inches with 4 inches thickness

Procedure:

diy bed sheet procedure


  • Cut a 76x91 inches fabric
  • Cut the 8x8 inches square of four corners like what you see on the image with dotted lines.


  • connect the corners (follow the arrows) by folding them together two times of 1/4 inch each fold then sew.
  • After attaching and sewing the corners, you will now figure a box-like image. Fold the edge of the bed sheet two times with half an inch each fold then sew it to prevent ripping..
  • Insert a 10 inch garter in each corner within the "G" marks which is 20 inches long. make sure to insert the garter in the middle of the corner, this will serve as the holders of the bed sheet.
Now, were done with the bed sheet, my next blog would be making a pillow case. That's all folks and enjoy making your own bed sheet now!


Picture Gallery

DIY kiddie summer dress with procedure

diy kiddie summer dress

It's summer time! I'm so excited to go to the beach with my family but my kid's summer dress and suits are no longer fit as they grew so fast. This is the reason why I write articles about DIY or Do It Your self handicraft. I want to learn to do simple things because by doing this, I am practicing my motto in life which is "if others can, why can't I?" I think this should be everyone's motto because life is a continuous learning. In my previous article, I wrote about making your own swim suit out of remnants of cloth,and beacause it's summer again, I would like to share how did I make a kiddie summer wear for my 4 year old daughter. 

Materials needed are:

  • floral fabrics, square cut, L-20 inches,H-20 inches
  • ribbons

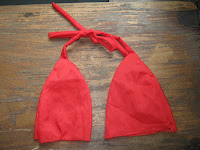
  • two sets of triangular cut for chest area
  • two sets of cotton fabric, L-2 in,H-10 in
Procedure:

  • Stitch the ribbon and then attach to the triangles which are already sewed.
  • attach the cotton fabric at the bottom
<img src="dress.gif" alt=" procedure in making summer dress out of recycled cloth" />
  • attach the floral fabric to the top of our summer dress
diy kiddie summer dressdiy kiddie summer dress

                              Back View                               font View


Here is the finished product of our kiddie summer dress. The hat's procedure is available at: http://handicraft-from-wastes.blogspot.com/2011/12/how-to-make-hat-from-restaso-remnants.html


Buy Kiddie Summer dress at Amazon