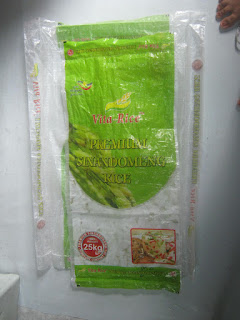
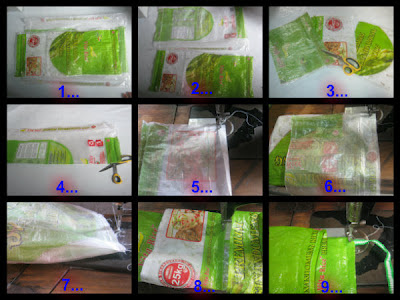
What is sack? It is a common packaging material used as a rice container. Sack is made of straw and plastic which is proven durable materials. The sack lives for years and it is non-biodegradable. So if we throw it together with our everyday trash, it can take up to 10 to 20 years before it is totally decomposed which is not good for our environment. Since waste reduction and recycling are partners in taking care our environment, we should think of ways on how to recycle sacks. We may not totally eliminate them but we can always re-use them as a recycled product.
Do you have a bulk of shoes and slippers below your stairs or doorstep? Sometimes, you inevitably stepped on those shoe or slipper pile. It's very annoying to see those mess on your way but you can't keep those things because you're using them regularly. There's a solution to your problem because you can hang them right beside your stair or doorstep.
Today I'm going to show you how to recycle sacks into a hanging shoe rack. Hanging shoe rack is very convenient to use. You could easily pick your desired shoe and at the same time you can save a lot of space in your home. Let's begin with the step procedure by preparing these materials:DIY Mini Garden out of Old Drums and used Tires
The last month's monsoon resulted to a serious flood in the area of Manila and even here in Laguna. It was perhaps the worst floods to hit the area of Calamba that I've witnessed in my entire life.
According to my father's story, The last great flood that hits our province was in 1972, 3 years before I born. Even the previous storm Ondoy did not leave that strong impact in our area. Now I basically just say it has a very big serious negative effects to the people living Laguna. As I watched the footage on television, I saw a thick garbage returned by the sea to the land. Indiscriminate waste dumped by the people into the sea and to the river caused the blockage of the waterways.
They said, we should blame the government for neglecting the proposed rehabilitation project of canals, rivers and sea. In my perspective, government's fault should only be considered as the secondary factor causing of this wide flood, the direct culprit here are the abusive people who throw their trash improperly to anywhere they want.
There are also illegal loggers to blame, who mercilessly cut the trees which serves as the reconstruction of our forests. When will those people realize that the more they abuse the environment, the more chances of calamities and natural disasters to heat the world. These are the reasons why we have to be conscious, stop being so insensitive as if were superheroes that can always survive. Act now! do something about saving the environment. As I said before, there are hundred or thousands ways on how to protect our environment, doing just one will contribute a huge help in saving our mother earth. The number one and the easiest way we can do to contribute in saving mother earth is by means of recycling. Recycling waste and used materials can do a lot in minimizing our everyday wastes. If you're a regular reader of this blog, you're already familiar with those recycling projects I have finished and shared thru this blog. I have done recycling old pants, recycling left-over clothes, recycling plastic foils, recycling old magazine, recycling news papers, recycling socks and many more recycling ideas all have posted on this blog. Let me give you another more example of recycling waste.
Recycle an Old Drum into a mini garden.
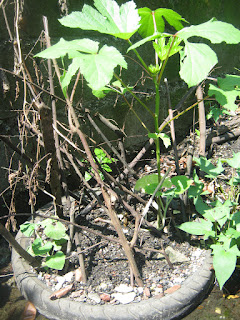
This is an old rusted drum. If I'll just junk it, it would be stacked for a longer time. It may also be scattered in my back yard. What I did with this drum is I use it as a mini garden. I put some garden soil in it. Actually, I also composed the garden soil that I used here. I simply put all biodegradable wastes in an old pale with holes at the bottom and cover with soil every time I put biodegradable wastes such as left-over foods or swept leaves. If you'll notice the water level in our back yard is a bit high, you'll probably think that it would be impossible to grow a plant on a flood. But with this old drum, I'm able to grow a vegetable on a flooded area. You won't believe that this "Okra" plant is now bearing fruit because of the healthy garden soil I made my self.
Worn Out Tire as Mini-garden
My husband changes his tires every 3 months so they used to stocked in the garage. They all scattered and became a home of deadly mosquitoes carrying dengue fever. Since my heart loves recycling, instead of thinking to throw them away, I decided to make it as another mini garden. As what I did with the drum, i put garden soil in it and plant vegetables. Every morning, I am so excited to visit my mini garden, I can't explain the feeling that I've contributed a help to minimize waste that helps protect the environment. The fruits of my mini garden were just my bonus. Anyone can do this, even in water world, we can still plant by the help of recycled wastes. But let's hope and pray that we won't become a Water World someday.
DIY Coin Purse from remnants of Cloth or used old cloth
The coin purse is something that's always with us on our daily lives. We use coin purse when shopping, going to work or even attending school. The purpose of the coin purse is to exclude coins from the entire money so it wouldn't be too difficult to get if you have to pay coins especially if you're going to pay the fare because there are drivers who doesn't give change due to lacking of coins. So we always carry a coin purse wherever we go. By doing this, we don't need to shake the entire bag or wallet to see if there were coins inside. This post will teach you how to make a coin purse from recycled waste materials.
When sending my kids to school, I always make sure that they have enough coins to pay for their needs like fare, food and drinks. My kids are too shy to ask for a change for their money if they had to, so I should always give them coins for them to pay just enough for a certain thing or service they needed. This is why they always have a coin purse hanged on their shoulders. It's just a simple DIY procedure for recycled coin purse that I made from used old clothes that looks like just a necklace. I just put an ID holder to make sure that the recycled coin purse wouldn't be lost or misplaced because most kids are too careless when handling money so we should assist them and teach them how to be careful with it.
This blog is about making a simple coin purse out of used old cloth but you can also use remnants of left-over cloth here.You can also use Old pants here for your boy's recycled coin purse. It's so easy to make a recycled coin purse from recycled cloth, you just have to follow only 6 steps.
|
| ||||
|
| ||||
|---|---|---|---|---|---|
|
|
- Step 1 - Cut 4 pieces of recycled cloth, 2 for the outer fabric and 2 for the lining
- Step 2 - Insert the zipper between the lining and the outer fabric. Two fabrics should face each other.
- Step 3 - Revert the fabrics and do the same procedure with the other set of fabrics.
- Step 5 - When stitching, You have to open the zipper so you can revert the coin purse and you have to begin with the outer fabric. Two faces of fabrics should face each other when you stitch or sew them. Look at the image no. 5 for the result. You have to stitch the lining too but this time, you have to make a clean stitching here because you can't revert it like what we did on the outer fabrics.
- Step 6 - Insert the lining inside the purse and you're done with making a simple recycled coin purse.
I made these two designs of recycled coin purses , the red is the one I made for my girl. The materials I used here is the left-over cloth from my bed sheet. The blue one is the purse I made for my boy. The materials I used here is the left-over fabric of my husband's used old pants which I cut long ago to make a short pants. Don't forget to add holder for each coin purse so you can add a neck tie to hang the purse on their neck so it wouldn't be lost or misplaced.
| girl's recycled coin purse | boy's recycled coin purse |
|---|---|
Subscribe to:
Posts (Atom)


