Showing posts with label recycling. Show all posts

5 Creative Ways to Recycle Plastic Bottles

Plastic bottles or PET bottles are  one of those recyclable wastes. If you care for the environment, you would not dispose wastes like this anywhere you like. Did you know that an average time for plastic bottles to completely degrade is atleast 450 years? Yes! 450 long years and that is equivalent to 5-6 generations. Every year, there are tons of used plastic bottles are about to up the landfills, thanks to our countrymen who find treasure out of these wastes, because of them the continuous increment of plastic wastes is being controlled.

Now, let me show you some brilliant and creative ideas how plastic bottles can be re-used and recycled.
(Disclamer: This site do not own the following posts: the credit has been given to the original source)

theownerbuildernetwork

Pen Holder - it's an easy way to reinvent your used plastic bottles, Create as many sections as you want.
Source: Boredpanda
Hanging Garden - this is ideal for houses with very limited space, hang them on your wall or fence and you can have fresh leafy veggies within your backyard without consuming so much space.

source: Ippinka

Boats made of plastic bottles - this is one of my favorites and still dreaming that one day I could make one similar like this and share it to my countrymen living in flooded area.

source: Inhabitat

Life Jacket made of Plastic Bottles - for only four PET bottles, you can create your own life jacket. This product needs a little knowledge in sewing to make the base.


Christmas tree made of plastic bottles - this is my daughter's project in school, they gathered green plastic bottles. and arrange it to form a pyramid, when designed with glittered balls and flowers, the  the result is amazing!

This article was originally posted at: www.mommyyah.com


Amazing crafts out of used old books and magazines


Books, magazines, news papers; I have lots of them in my stock room. Since computers and internet evolved, I forgot to turn the pages of my reading collections. Way back in 90's I used to buy books like romance, inspirational and even encyclopedias, I was a certified book worm. I was also a subscriber of news papers and magazines. But when I learned the convenience of using computer, I decided to stop collecting books and my I just kept my old book in a a box and placed them in a stock room.

While I was cleaning the house, I turned on to those stuff. I remember how valuable they were to me and I can't imagine myself throwing them into trash. Because of this, my crafty mind prevails once again. I already posted articles about recycling papers and magazine at news paper recycling and I think I have to post more to promote awareness about the good effect of recycling.

This time I want to impart different crafts made of used old books. I got these ideas upon browsing the internet and they are all great! There are lots of people who committed themselves in protecting our environment by promoting the good effect of recycling and I am proud to say that I am one of them.

photo by jacketflap.com

Book Bag - this bag is made of the thick cover of an old book made by jacketflap. It is simply designed with beautiful beads handle. I adore this recycled bag fro book cover because I know how durable these old covers are and I'm sure I could put my stuffs in it without worrying about its sturdiness. This is a good recycling idea for your kid's school projects and likewise a great way to promote recycling.

photo by: cutoutandkeep.net
Magazine Waste Bin - I've this amazing magazine craft at Cutoutandkeep.net. It'snice to have one of these in my kitchen because it's beautiful and unique. You just have to put waste bag inside to prevent leak. This can also be a great small stuff's container, you can place your art materials here or your kid's toys and other similar things.

photo by ahomeandfamily
Book vase - I'm so amazed with this very creative craft by ahomeandfamily. The author offers full tutorial in making this beautiful vase out of used old book, just visit the photo link to learn more. I gues this vase could be more pleasing if it will be painted or varnished and also to make it more sturdy but this is such a great recycling idea.

photo by flickrhivemind.net
New Paper wicker Bowl - posted by flickrhivemind, this is indeed a great recycled product out of news paper. You can place fruits here or other stuff like little school materials. This site offers incredible recycled product photos. If you want to learn more about recycling, you can visit the link above.

Amazing crafts out of used tin cans


Tin cans are common food packaging or container for the distribution of preserved goods. These steel containers are just one of those everyday wastes that a house hold ordinarily throw in their trash cans. Tin cans are recyclable infact, it belongs to those money making trash that can be sold for 5pesos/kilogram in the Philippines.

There are two ways to dispose tin cans; sell it to the junk shop or recycle it yourself. From different recycling and craft sites, I collected some ideas on how to recycle tin cans.

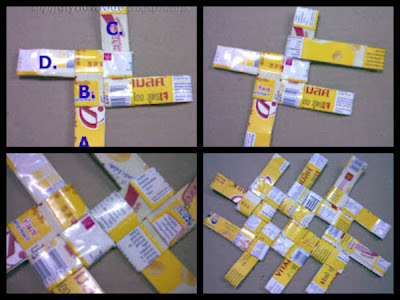
photo by greenprophet

This is called a "shining arc of Israel", an amazing arc made of soup cans. I've found this amazing tin can recycling from greenprophet. It says that Israelis made this amazing craft out of soup cans. According to the article, Israel artists love to turn ordinary objects into beautiful arts and it's indeed an incredible craft, a good way to re-use waste materials like tin cans.

photo by: makehandicraft
Turn your tin cans into a mini garden. These cute flower pots are made from soft drinks in can, a very brilliant idea shared to us by makehandicraft.com. You can place these cans on your garden, terraces or you can even hang it to save space.

photo by: lifetussle
I can't believe that a trash could be an amazing toy car like this! This one is a creative way to recycle coca-cola cans posted by Lifetussle. I love the idea of making a toy car out of soft drink cans, the one who created it must be a very good artist to have this brilliant idea. I wish i could make one for my son coz he loves hand-made toys.

photo by eco-artware
Can you imagine your self living in a can house, well I find it so interesting to live here but I am not Architect Richard Van Os Keuls who made this amazing house made of soda cans. Eco-artware.com posted this article entited "A can-do house: A new twist to Aluminum siding.

photo by junmarketstyle

This is a post from junmarketstyle entitled "Vintage tea tin pendant lights". For me, these could be mini chandeliers. This is another brilliant idea to recycle tin cans, If you want to learn the procedure, just visit the link and you'll find the basic tutorial there.

There are lots of amazing products made of recycled tin cans and these should serve as inspirations to discipline ourselves in waste segregation. Do not just throw and throw cause there may be a good way to re-use those materials which we consider as trash. That's all folks and happy recycling!

DIY: Quick repair of malfunctioning zipper

It happens sometimes, when you're on a trip and the zipper of your back pack has suddenly malfunction or you have most loved coat, shorts or jeans which has zipper glitch. On the off chance that you experience such circumstances, don't instantly cast your things into scrap, reuse them .

There are two sorts of damaged zipper: repairable and non-repairable.

Non repairable zipper damage has no other solution than bringing them to a sewer to supplant with another zipper. The zipper is non-repairable in the event that it has missing teeth. The other sort of zipper deformity is the particular case that is repairable. At the point when all the  teeth are still in place, the zipper could be repaired effortlessly and rapidly.

The regular reason of a zipper glitch is a direct result of a detached slider. A zipper slider is the zipper head with two sides, sliding to close a zipper. In the event that it gets excessively lose, it won't have the capacity to zip a Zipper. It's extremely easy to repair a loose slider. You simply require a pincers or a pliers to tighten the sides of the slider.

Quick Zipper repair procedure:

  • Get a pliers 
  • Tighten the sides of the slider 
  • Then zip and you're done! 
There's an alternate diy procedure of repairing a malfunctioning zipper. It obliges a touch of sewing yet you can do it by emulating the procedure, please allude to the pictures.


  • First find a used zipper from your old pants, shorts or jacket. 
  • Cut both sides of used zipper 
  • Pull the slider and disjoint from the zipper 
  • Untie the top stitch of the Zipper you wanted to repair( see the images)
  • Insert both sides of zipper to slider as a replacement 
  • Slide down the zipper 
  • At that point restore the untied join of the jeans. 


Amazing craft: Different Bag Designs Made of Drinking Straws


I adore hand-made bags! In my art blog, I generally compose articles about diverse sorts of hand-made bags. This time, I need to impart these exceptionally adorable totes made of drinking straws. 

These excellent crafts are my companion's manifestations. I inquired as to whether I can compose a post about her specialty and she said "yes"! She additionally welcomed me to go to her place so she could show me the entire technique in making bags out of drinking straw. 
<img src="straw 3bag.gif" alt="different designs of bags made of straw " />
Straw Hand-Bag


<img src="straw bag.gif" alt="different designs of bags made of straw " />
Straw Bags
I truly needed to take in the system but I never had enough time to visit her, perhaps in due time. My companion made her own particular exceptional plans of bags. She has hand bags for mothers like me,  gather packs for children and a staple crate all made of drinking straws. 
<img src="straw 2 bag.gif" alt="different designs of bags made of straw " />
straw bags


This specialty is an alternate decent business thought for homemakers, its likewise one great purpose behind us mothers to bond with our children. The technique as per my companion is not difficult to learn, truth be told, she made these straw bags with the assistance of her children. 

I truly wish I could visit my companion so I could take in the methodology and I will clearly transfer the complete steps on my specialty blog at http://diycraftarts.blogspot.com


6 Ways to recycle an old denim


We moms, should learn everything about recycling so we don't waste anything instead we make something new out of waste. Denims are pants that usually made of maong fabric. A denim easily becomes out of fashion. We've witnessed the sudden change of denim trends from bootleg to straight cut, from straight cut to skinny and we don't want to be left behind the trends. 

This is the main reason why most of us, especially ladies have a collection of different denim cuts.
Some straight cut denims can be easily converted to skinny style by cutting an inch or two from the sides.
Cutting should begin at the hip line down the bottom. I did this procedure in some of my denims but you can't do the same to other styles of old denims. In this case, you have to know that there are other creative ways to recycle or reinvent your old fashioned denims. Below are some if the great and easy ways to give your old fashioned denims a new life:
<img src="denim recycling.gif" alt="six ways to recycle old denims " />


  • Three Fourths- by cutting the below knee part of a denim, you easily converted it into a three fourths pants or as what they so called pedal. Just fold the  bottom about 3 inches and from there, fold an inch inside to prevent ripping. You can either sew the entire folded part or stitch the two sides alone.
  • Shorts- if you don't want it to be long, you can cut it shorter so you make a shorts. Used denims are comfortable to wear as shorts and it's even better than buying a new one.

How to make a simple shorts from an old casual Polo


Hi mommies! I'm thinking if some of you can relate to this post. Is anyone reading this blog has the same problem as mine? I have this huge stock of old casual polo and shirts of my husband.

These clothes are the ones which are being left by the trend. The lousy and extra large polo and shirts which once became a trend but now out of the flow.

I've discovered a solution to this not so heavy but  serious problem, and this is by recycling these old polo to kiddie shorts.

Because I have three kids and all of them love wearing  shorts while at home. I got two solutions in one action, I can save space from my closet and at the same time, I could make shorts for my kids out of it.

Here's my example of cutting an old casual polo to create a simple kiddie shorts.
recycle old casual polo to shorts for kids <img src="shorts.gif" alt="How to cut an old polo to make a kiddie shorts " />
This is my husband's large polo. Cutting is very easy since I'm making a simple design of shorts. Just fold the polo in the middle then cut as directed on the image. Cutting allowance should be 5 inches from the actual size. Let's say that your kid has 20 waist line and 15 legs size, you have to cut 25 waist line and 20 leg size. You should follow the same allowance when you measure the waist to the upper leg. Make sure you make the cutting right by flatting the polo, matching the ends so you'll have a perfect cut of your shorts.

The image below will show you the cutting steps using a virgin fabric.
procedure in cutting simple designed shorts
This is how you cut a fabric to make a simple design of shorts.

  • Step 1: Get two square cut of fabrics according to your desired size
  • Step 2: Fold each fabric in the middle.
  • Step 3: Cut as directed n the picture
  • Step 4: Check if you cut the same size f both half
  • Step 5: Cut two pieces of rectangle shape of small fabric about 6 inches wide and 5 inches tall,this will be used as pockets. Cut another small length of fabric about 2 inches tall and 5 inches wide, this will be the edging of the pockets. The pocket is an inch wider because you will fold it in the middle for a little touch art.


Now we're ready for sewing procedure.
<img src="shorts.gif" alt="procedure in making kiddie shorts" />

1. fold the bottom leg part 2x,about an inch wide
2. Connect and sew to close the leg part. Do the steps 1-2 to the other half.
3. Double stitch to avoid ripping
4. This is how it looks like
5. Now connect two halves
6. Again, double stitch to avoid ripping
7. Fold the waist 2x about 3/4 inch wide, this is where the garter should be inserted
8. Now, insert the garter, then lock.
9.Your finished product

Let's see how it looks like when my daughter wears it. The most important thing to consider in making shorts is that it should be comfortable to wear, also this rainy season, choose a fabric which is easy to dry.
how t make shorts
My daughter liked it, she really likes this simple design of shorts she says it's very comfy plus two big pockets on the sides so she could put some stuff in it. This is another business idea for moms who seeks work at home job. Try it moms! save money, produce your own and organize your closet.

Take a look at my work. I made these shorts out of left-over fabrics and old casual polo. 
<img src="kiddie shorts.gif" alt="Kiddie shorts " />


Make a super absorbent doormats out of used old socks

Hello crafty Moms! I'm pretty sure that you're going to love my today's post because it has something to do with sorting, cleaning and recycling which all moms wish to do in spare time. Yes mommies! because time flies so fast, maybe it was not so long ago since you sorted your worn out socks from the  good ones. Yes, it's all about used socks again! As we all experienced, after a school year ends, socks life ends too so when another school year starts, we moms of course provide new things like shoes, bags and most especially school socks, therefore, we would have a stock of used all socks. Well for me, we really have to change socks every year whether it's worn out or not. Why? I don't know if it's just my assumption but I think used old socks become smelly the longer you use it. Now that school year  just started, i also started to sort things out of the closet.

I already had similar posts about recycling  used old socks such as recycling socks to pony tail, pot holder, puppet and now I want to share another socks recycling and it is making absorbent doormats out of used old socks. Now I want  to share my craft work which is recycling used old socks to absorbent doormat. What I love about socks is the absorbent fabric which is good to place on the restroom doorsteps. The absorbent texture will then keep your feet dry after bathing or using the restroom. It's fun and easy to do this craft, all you have to do is gather all the worn out or used old socks like what I have on the picture.


These are my kids used socks, I chose the two color combination because I want to make my doormat a colorful one. My husband also had used old socks which are dark in color and I made them a floor rag. I really love to use the sock rag especially when cleaning wet floors.


<img src="doormat.gif" alt="How to make doormats out of recycled socks " />
 From left to right downward are the step by step procedure in making doormat out of used old socks.


  • Cut the socks in the middle
  • Open it
  • Cut the toe part in to four to make it flat
  • Arrange the socks to your desired thickness, length and width like what you see on the images to form a rectangular shaped doormat
  • After flatting the socks, you can now stitch manually or sew it.


<img src="doormats.gif" alt="doormats out of socks " />
Two types of doormats that you can make out of used old socks

Making Swan Decor out of Paper


I'm so in-love with recycled handicraft because by recycling, we could convert trash into a beautiful, useful products. Today, I'm going to teach you how to make a decor from old magazines and news papers. It's another DIY craft to be enjoyed doing by the whole family.

Materials needed:

Old magazine pages
Scissor
Glue

Procedure:
<img src="fold.gif" alt="procedure in making swan out of magazine pages " />
  • Cut a small rectangle from a magazine's page.
  • Fold like image 2,3,4...
    <img src="swan.gif" alt="procedure in making swan out of magazine pages " />
  •  Connect each folded paper to make a base. Connecting folded paper can make different shapes.
The provided images are folding and connecting instructions only.Connect all the folded papers and make your own design like swan,vase and others. You can make different products by learning the basic folding of magazine pages. Making paper swan is not so easy, it needs several trial and error to make it perfectly. Connecting the folded paper maybe so confusing so be patient in learning the step by step procedure in making swan from recycled magazine.

DIY Flower vase made of news paper

I have several posts about making crafts from old news paper and I just want to add one more. This is a simple DIY  flower vase procedure using old news paper.  I’ll make this post clear and simple, coz it's just an additional post.  You can find complete tutorial about twisting and folding a news paper to make a recycled craft like this in my previous posts.
I used a pattern here which is an old boring vase made of glass. Unfortunately,  I wasn't able to use a molder because it couldn't be removed after because of  its  curve.
I think I don't have to upload here the step by step procedure coz I believe that you,  especially my regular visitors already knew how to do it,  but for some who are new to my site,  please feel free to browse the content of my blog.
The flower I used to design the vase is made of folded paper and cut to form a flower and the small button of my old blouse added some impact on it.  This recycled vase is a good idea for school projects with recycling theme. 
This is a rush post since I am using my newly installed Blogger mobile application. So guys,  bear with my errors I am just trying to familiarize myself with this application.

Best SOS idea, DIY Emergency Lamp for unexpected long brown-outs


<img src="lamp.gif" alt=" procedure in making emergency lamp out of salt and oil" />
YoandaPh caused a severe damage in Meralco connections in our province. We had no power for amost 3 weeks. All our gadgets, flash lights and rechargeable lamps were badly drained and so we had to find ways to atleast have a little light at night.

Good thing that I still remember my grade school  science experiment, making emergency lamp using salt and oil. Learning how to do this craft is necessary especially during calamities causing unexpected long brown-outs. This is the reason why I want to share here the procedure to make a recycled emergency lamp to give a little SOS tip. We can make this recycled emergency lamp anytime using materials we commonly have inside our house.

The DIY procedure of recycled emergency lamp is really easy to do, it's also fun doing it with your kids so you'll have another reason to  bond. My six year old daughter enjoys doing this craft, but I make sure to always assist her especially when lighting the lamp, just always keep an eye to your kids when making this craft. Doing this craft, you have to prepare the following materials:

  • 1 pc. tin can (wide and short preferably)
  • a piece of cotton
  • a match stick or if you don't have one, you can use a toothpick or any other wood stick.(should be an inch taller than the can
  • used cooking oil
  • rock salt or fine salt
  • a lighter to light the lamp

Procedure:

  • Clean the can and dry it with cloth
  • Put the salt inside the can about 3/4 full.
  • Add used cooking oil a little higher than the salt.
  • Wrap the entire stick with cotton. The tip should look the tip of a cotton bud.
  • Dip the entire stick in used cooking oil and then dip it in the middle until you reach the bottom of the can.
  • Using a lighter, light your emergency lamp

You can now use your recycled emergency lamp made of recycled tin can and used cooking oil. This lamp can be used overnight. If the lamp failed to produce light, it's just an indication that the oil is already drained  so you have to refill it with another used cooking oil and you can use it again. You also have to replace the wrapped stick if you think you needed to. I just want to remind you to always keep this lighted lamp out of reach of children and from easy to ignite materials such as papers, plastic, cloth and etc. I hope this article will help you in your waste materials and I would appreciate if you leave some comments, tips and suggestions below. Thank you everyone for visiting and reading my blog post about DIY recycling tin can and used cooking oil to emergency lamp.

DIY Shoe Rack from Recycled Sack

diy recycling shoe organizer
What is  sack? It is a common packaging material used as a rice container. Sack is made of straw and plastic which is proven durable materials. The sack lives for years and it is non-biodegradable. So if we throw it together with our everyday trash, it can take up to 10 to 20 years before it is totally decomposed which is not good for our environment. Since waste reduction and recycling are partners in taking care our environment, we should think of ways on how to recycle sacks. We may not totally eliminate them but we can always re-use them as a recycled product.

 Do you have a bulk of shoes and slippers below your stairs or doorstep? Sometimes, you inevitably stepped on those shoe or slipper pile. It's very annoying to see those mess on your way but you can't keep those things because you're using them regularly. There's a solution to your problem because you can hang them right beside your stair or doorstep.

Today I'm going to show you how to recycle sacks into a hanging shoe rack. Hanging shoe rack is very convenient to use. You could easily pick your desired shoe and at the same time you can save a lot of space in your home. Let's begin with the step procedure by preparing these materials:
  • 1 whole sack (preferrably rice sack)
  • scissor
  • sewing machine
  • tape measure

Procedure: Follow the images as you read the step by step procedure.
diy shoe organizer
  • Step 1 - Get a whole rice sack.
  • Step 2 -  Divide the sack into two unequal parts. One half is 13 inches and the other half is 21 inches. You should not cut the sack default length. These will serve as pocket layers.
  • Step 3 - Divide the smaller half in to 3 equal parts. 
  • Step 4 - Divide the wider half into two equal parts lengthwise. 
  • Step 5 - Now fold the edge of each layer at-least half an inch (the 3 equal sized) then stitch to prevent ripping. 
  • Step 6 -  Face to face the two lengthwise and sandwich the layers and sew.
  • Step 7 - Sew the the bottom to lock fold-in the two excess sides and revert it.
  • Step 8 - Sew the bottom of each layer.
  • Step 9 - Attach a handle or a holder at the top of our product. Fold-in the edges, sandwich the holder then sew.
Now we're done with the hanging shoes rack made of recycled rice sack. 

Visit Amazon for more shoe organizer designs. 

DIY Recycled Lunch Bag out of recycled old clothes

diy used clothes recycled to lunch bag 
6927";
Lunch bag is very useful to our kids in school. Lunch bag should be light weight so it's easy to carry  for our small kids, it should also can stand alone to prevent the foods and drinks to mess inside. A lunch bag is far different to lunch box when it comes to convenience and food safety. As for my kids, especially my girl, they prefer to bring lunch bag than bag because they could hang it on their shoulders and it is so convenient to bring anywhere, anytime. I collected some facts why using a lunch bag is much more convenient than using a classic lunch box:


   Lunch Bag                                                Lunch Box
. easy to carry                                                                  .  noisy box
. light weight                                                                     . childish like
. tightly closed                                                                  . opens accidentally
. unbreakable                                                                   . easily breaks
. fashionable                                                                     . a lunch box looks like attache case

These maybe are the reasons why my 4 year old, fashionable daughter doesn't want to carry her lunchbox in school. I'm so glad to learn the steps in making a lunch bag for my kids. It's comfortable to carry especially  for my daughter who only needs to bring meal alone in school because all of her things are always being left inside the classroom. I understand her why she always wants a lunch bag which is like just a normal  but fashionable bag.

I've found making a lunch bag so fun and easy, well of course, everything that I do for my kids is always fun form me. Before proceeding the procedures, you have to prepare all the materials needed to make a bag. In lunch bag tutorial, I used a recycled cloth which is my old used skirt. I prepared these materials with measurement below for the lunch bag pattern.
Materials:
  • strap - 2x 30 inches cloth
  • ribbon cord - 1 1/2 x 30 inches cloth
  • Body (front and back) - 2 pcs. 8x10 inches cloth
  • Body (sides) - 2 pcs. 5x10 inches cloth
  • pocket - 8x7 inches cloth
  • bottom - 8x7 inches cloth
  • for designs - different colors of threads
  • garter
  • stick for inverting the strap and ribbon cord
  • sewing machine or stitching kit
  • tape measure
  • scissor
  • marker for drawing designs
Procedure:
lunch bag diy procedure
  • Connect all parts: the front, back, sides and bottom of the bag. Don't forget to attach the pocket when sewing the front part. a garter should already inserted when sewing the pocket to the body.
  • Attach the body  to the bottom. You can make an inside lining if you want. Just choose a cloth best for it like gina or satin fabrics. The measurement for the lining should be exactly the same as the body of the bag.
  •  Fold the mouth of the bag  at 1/2 inch then sew. 
  • Prepare the ribbon cord. Simply fold and stitch both ends to the middle. Leave at least one inch for inversion. Revert the cord using a stick and insert in to the folder mouth of the bag.
  •  Prepare the star by folding and stitching. Revert using a stick and attach it on both sides sides of the bag's mouth. 
  • For the embroidered design, I used back stitching stroke for the heart and the letters. You can use other strokes you want, I just did the simplest. Choose colorful yarns or threads. On this project, i embroidered my daughter's name "Clavern" to make it personalized.

DIY recycled hand Puppet out of socks


Recycling and doing simple craft out of waste always fulfills my advocacy which is to make our environment less waste by recycling used materials. I always have guilt feeling every time I had to throw a thing in the garbage. I really believe that a certain thing always has it's value no matter how old, used or new a thing is. It's just a matter of creativity and love for our mother earth.


After cleaning my kid's sock closet days ago, I already have have finished a a project which is recycling used socks to a hair pony tail. Now, with this article, I’m going to show you how an old sock will transform into a creative DIY craft or handicraft: a sock puppet. My kids really love puppets that's why I have different hand puppets at home. I used to talk to them with my hand puppet. It always eases their tantrums and sometimes, hand puppet talk is a way for my kids to say "sorry" whenever they committed mistakes. During our bonding time, we used to play with hand puppets and we always enjoy talking and playing with our hands impersonating cartoon characters. Now, I'm gonna share a simple way to recycle your old socks by making a cute hand puppet.

diy hand puppet out of used socks


I chose to design a puppet dog from a bulk of old socks I sorted days ago. Since the common colors of my kid’s socks are a combination of gray and white, I came up with the idea of making a cute gray dog puppet. This combination is also good for cows, cat and other puppet animals. Doing a puppet from recycled materials is fun and easy. You can make this project together with your kids during your bonding moment.

In doing this project, you have to prepare the following materials:

  • 3 pcs. of used old socks with the same colors
  • scissor
  • needle and thread
  • marker
The procedure in making a sock puppet is very easy, even kids will enjoy doing it with their parents. Parents should guide their kids with the procedure especially when they’re handling a scissor and a needle.

Procedure in making a puppet from recycled socks:


  • Get 2 pcs. Of used old socks. Choose color that coordinates with each other to make a dog like image.
  • Cut the socks; make one bigger than the other one. The upper part of the mouth is bigger than the lower part.
  • Connect the two sides of each sock to form the mouth of the puppet. This will serve as the mouth of our puppet
  • Get another sock to make the body of our puppet, cut the toe nail part.
  • Attach the body to the mouth of our dog puppet.
  • Make a triangle shape pair of ears and attach them to both sides of the head.
  • Mark the eyes and nose using your marker. If you want, you can use buttons to make eyes.
  • And there you have it! A dog puppet handicraft from used old socks.

Now, don't think of throwing your used old socks in the garbage. Remember there's a lot of productive ways to make these wastes still useful. Always remember: segregate wastes, re-use and recycle. Minimize wastes by making useful products out of it.
Article about recycling old socks you may also like: How to make a pony tail from used old socks.


How to make Bags made of straw


A drinking straw is a short tube intended for transferring a beverage from its container to the mouth of the drinker by use of suction. A thin tube of plastic (such as polypropylene and polystyrene) or other material, straight or with an accordion-like living hinge, it is employed by being held with one end in the mouth and another end in the drink. Muscular action reduces air pressure in the mouth, whereupon atmospheric pressure forces the drink up the straw
. (source: http://en.wikipedia.org/wiki/Drinking_straw)
In the Philippines, we use drinking straw in past food, variety stores and restaurants for drinks. Everyday a large amount of drinking straw is being thrown in the garbage that contributes to a large amount of waste in the country. I'm so glad that people get more aware of the increasing amount of trash which is very alarming and dangerous to environment. People now are more determined to their advocates about recycling and minimizing wastes.

Lately, I discovered another DIY craft, a creative design of recycled handicraft from waste. It is made of drinking straw that we usually found in a sari-sari (variety) store or canteen's garbage. Unfortunately, I haven't learned yet the procedure ,what I learned about this recycled craft is that it is made by folding recycled used drinking straws. As you see all those images above, it comes in various designs, colors and sizes which are very attractive, thanks to my FaceBook friend Lea who gave me her approval to upload her artworks here in my blog. She's also willing to teach me how to do the procedure of making bags from straw but as of now, we both have to find time to do this. I wrote this blog because I want to tell the whole world that there is a beautiful craft out of used straws, and i hope like me, my readers also get some inspirations to give attention to small things like straw, that if we only use our creative imagination, we could make a hobby or better yet...a living out of garbage and waste materials.

Different designs and style of woven drinking straw bags. These bags are so fashionable and so light to carry since it is made of light material. There are designs perfect women, ladies and girls.


The materials used on the above sample is junk food wrapper. Assuming that you are weaving a drinking straw, the procedure is what you see on the above images. Start from a single fold then add another as you go wider. Weave as wide as you want until you weave a bag of your design.


DIY Hair Pony Tail out of Recycled Socks

It's kid's drawers cleaning time! I had to separate all the good ones from the old ones. the result: a bulk of used old socks! These socks are made of thick, soft fabrics that's why I had a guilt feeling thinking that I had to throw all of them. My heart says..."don't throw them, instead think of a way to make these used socks useful."...and so I followed my heart. I started to remember what I always tell to myself whenever I do sorting things like this: reduce...re-use and recycle. Now I will show you how to make another DIY craft from used old socks, a hair pony tail.

Making this project is very simple, you just need to provide all the materials needed to make a hair pony tail made from used old socks. Moms like me, with long hair and always busy doing household chores, never been comfortable with laid hair while working at home. I want a bulk of hair pony tail in my beauty kit. Since I love recycling, I asked my self "why not make pony tails out of these waste socks". So here I am, typing my keyboard, complete with images to make a tutorial blog about recycling used old socks to hair pony tail.

Materials Needed:
  • used old socks, plain of printed
  • scissor
  • garter to be inserted inside the pony tail.
  • sewing machine or sewing kit if don't have one.
  • stick for inverting the sewed product

used socks recycling
Procedure in making a hair pony tail out of socks:
diy socks recycling
  • Get 1 pc. of used old socks
  • remove both ends
  • divide in to two parts
  • sew the reverse side the revert using a stick
  • attach the end to connect and make a round shape
  • we're done!
I used gray and white for this project but you can choose any color you want from the bulk of used old socks you sorted. If you have girl"s socks with colorful designs, it would be best fit to this project. I am sure your kids would love to wear it knowing that you made it for them with love. So start sorting and be creative in making products like this. Goodluck to your new found hobby! Remember that throwing things to garbage doesn't mean cleanliness, real cleanliness comes from the heart who loves the environment and mind that always thinks what's good to our mother earth. Recycling benefits not the environment but Us!

Random Posts

Blogger Tips and TricksLatest Tips And TricksBlogger Tricks