Showing posts with label craft. Show all posts

Amazing craft: Different Bag Designs Made of Drinking Straws


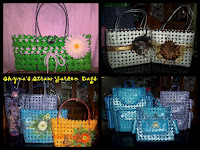
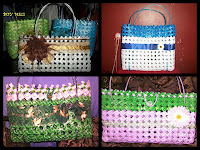
I adore hand-made bags! In my art blog, I generally compose articles about diverse sorts of hand-made bags. This time, I need to impart these exceptionally adorable totes made of drinking straws. 

These excellent crafts are my companion's manifestations. I inquired as to whether I can compose a post about her specialty and she said "yes"! She additionally welcomed me to go to her place so she could show me the entire technique in making bags out of drinking straw. 
<img src="straw 3bag.gif" alt="different designs of bags made of straw " />
Straw Hand-Bag


<img src="straw bag.gif" alt="different designs of bags made of straw " />
Straw Bags
I truly needed to take in the system but I never had enough time to visit her, perhaps in due time. My companion made her own particular exceptional plans of bags. She has hand bags for mothers like me,  gather packs for children and a staple crate all made of drinking straws. 
<img src="straw 2 bag.gif" alt="different designs of bags made of straw " />
straw bags


This specialty is an alternate decent business thought for homemakers, its likewise one great purpose behind us mothers to bond with our children. The technique as per my companion is not difficult to learn, truth be told, she made these straw bags with the assistance of her children. 

I truly wish I could visit my companion so I could take in the methodology and I will clearly transfer the complete steps on my specialty blog at http://diycraftarts.blogspot.com


DIY Quick Repair of defective zipper


It happens oftentimes when you're out of town and the zipper of your backpack has defunct unexpectedly or you have favorite jacket, short or pants which has zipper malfunction. If you encounter such situation, do not immediately cast your things into scrap, recycle them  instead.

There are two types of defective zipper: one is non-repairable.
This defect has no other solution than bringing them to a sewer to replace with a new zipper. The zipper is non-repairable if it has missing teeth. The other type of zipper defect is the one which is repairable. When all the  teeth are still intact, the zipper can be repaired easily and quickly.

 The common reason of zipper malfunction is because of a loose slider. A zipper slider is the zipper head with two sides sliding to close a zipper. If it gets too lose, it won't be able to zip a Zipper. It's very simple to repair a lose slider. You just need a pliers to tighten the sides of the slider.

Here's the DIY procedure to quickly repair a zipper.
<img src="zipper 2.gif" alt="defective zipper quick repair, no stitch " />


  • Get a pliers 
  • Tighten the sides of the slider 
  • Then zip and you're done! 


 There's another diy procedure of repairing a worn out zipper. It requires a little stitching but you can do it by following the procedure, please refer to the images.

<img src="zipper.gif" alt="DY quick repair of defective zipper " />

  • First find a used zipper from your old pants, shorts or jacket. 
  • Cut both sides of used zipper 
  • Pull the slider and disjoint from the zipper 
  • Untie the stitch of the top Zipper you wanted to repair( see the images)
  • Insert both sides of zipper to slider as a replacement 
  • Slide down the zipper 
  • Then restore the untied stitch of the pants.
You can use this diy procedure to repair all kinds of zippers. If you find this article helpful, please share!

Making Swan Decor out of Paper


I'm so in-love with recycled handicraft because by recycling, we could convert trash into a beautiful, useful products. Today, I'm going to teach you how to make a decor from old magazines and news papers. It's another DIY craft to be enjoyed doing by the whole family.

Materials needed:

Old magazine pages
Scissor
Glue

Procedure:
<img src="fold.gif" alt="procedure in making swan out of magazine pages " />
  • Cut a small rectangle from a magazine's page.
  • Fold like image 2,3,4...
    <img src="swan.gif" alt="procedure in making swan out of magazine pages " />
  •  Connect each folded paper to make a base. Connecting folded paper can make different shapes.
The provided images are folding and connecting instructions only.Connect all the folded papers and make your own design like swan,vase and others. You can make different products by learning the basic folding of magazine pages. Making paper swan is not so easy, it needs several trial and error to make it perfectly. Connecting the folded paper maybe so confusing so be patient in learning the step by step procedure in making swan from recycled magazine.

Different Ways to Recycle old T-shirts


No matter how old or worn out your shirt is, there still different ways to reinvent it. Recycling T-shirt is a hobby that could give you so many ideas. I was amazed when I searched the internet about T-shirt recycling or up cycling. There's so much ideas that you can use to recycle old t- shirts. I tried to make my own T-shirt recycling ideas ang this is what I'm gonna share to you my dear readers.
A T-shirt is usually made of cotton, a durable fabric that you can reuse even after it's worn out. I only picked some easy ways to recycle a shirt so I could make this post fast and simple.  I cut my old shirt to 1/2 inch thick and those strands lead me to make different recycled crafts like what you see on the picture.
different ways to upcycle,recycle and reinvent t-shiry
  • Cord- the strands can be used as cords of different purposes. Sometimes we need a cord to tie something like packages, a cord to replace a duster's straps or a cord of mosquito net. Just roll the straps and keep for future purposes.
  • Braided jumping rope- make your own jumping rope to lose weight or to be played by your kids. The cotton fabric is heavy when braided so its perfect to jump on it.
  • Braided Belt- braid shirt strands to fours. Braided T-shirt strands is best to make a belt. You can match it with your pants or dresses. It can also be a kid's fashionable belt.
  • Tied net- tie the strands together one by one and make your own basketball ring's net. Tying is very easy just look at the image to catch the idea. Tied shirt cords can also be made a swim suit tops or a simple head band. It's definitely no stitching needed.
  • A yarn for crochet- you can also make yarns from the strands you made. An ideal thickness to make a yarn for crochet is 1/3 inches. From these shirt yarns you can crochet rugs, hair bands, purses, bags and floor mats. You can also make bonnets out of shirt strands.
  • Bolero (blazers)-the leftover shirt top can be kept to be your blazer or bolero in tagalog. This can be your sleeveless tops to keep your arm flesh from exposure.  

  • Aother way to reinvent and to recycle T-shirt is to weave the strands. From weaving, you can make bags, doormats, vase mats, pot holders, pouches and purses. The idea of recycling old shirts is not limited as long as your heart is engaged into recycling. Always remember that waste materials can be reinvented just reduce, reuse and recycle.

DIY foldable eco friendly shopping bag

dig foldable shopping bag
Here at Crafty Mom Ideas, we give attention in making DIY products to help all interested mothers out there to learn how to make basic products we need in our house holds. This post is very special because it concerns our environment and how to protect it.
I'm so glad that authorities in most provinces and cities are now strictly implementing the "no plastic bags" policy in all merchants. It should have done a long time ago, maybe it did not become this worst. We all knew that plastic bags are non biodegradable, it can be very harmful to our environment. It takes 15 years or more before these plastic bags are totally decomposed.The tendency is to accumulate these wastes in our environment. It's very possible that we can create another mountain, a mountain of garbage! I'm inspired to make this article, why? Because this is another helpful DIY project. It's something we should learn to. I know some of you see things like what I do.I hate paper bags! I hate it because it's messy,it's not durable, and most of all it's not comfortable to handle.Eco-friendly bags are good but do I always have to buy it every time I buy groceries? Well, I have a simple solution here, to make DIY Eco shopping bag.This Eco shopping bag is something different. It's durable,reusable, handy and foldable. You can use new fabrics but I suggest,use recycled fabrics to make a double purpose: one is to save money and the other one is to recycle. Recycling is a very good hobby, it can do a lot to save our environment to its speedy destruction.This is why I created this DIY recycling craft blog, I am an advocate, I want to teach and encourage people to be one too.

Things needed to make a foldable shopping bag:


  • 2 pieces 15x20 inches used cloth. You can also quilt assorted used clothes.
  •  2 pieces 5x20 inches cloth for straps
  • 5x30 inches cloth to hold straps 
  • 12 inches zipper 


Procedures :


  • Connect the ends of the three sides of your 15x30 cloth. 
  • Double the stitch to ensure durability. 
  • Fold the straps lengthwise , the edges inside. 
  • Sew both sides.
  • Attach the straps by inserting the ends to the holder. 
  • Position them 5 inches below the mouth of the bag. 
  • Attach the zipper at the face of the bag, please refer to the picture to figure out how it should be attached and 
  • Lastly, fold and sew the mouth of your bag and your done!

How to Recycle News Paper to Wedding Souvenir


<img src="souvenir.gif" alt=" procedure in making wedding souvenir out of news paper" />


News Papers are very useful in our everyday life because it keeps us aware wherever we are. After reading the news, there are reasons why we should not throw the news papers because there are many different ways to make these used papers still useful. I have posted one way to recycle a news paper in my previous article in Handicraft and this is How to make a hand bag from news paper.

Wedding occasion shouldn't always be expensive. Paying all the bills, buying everything needed to the reception could be so bloody. But there are ways to cut or minimize the expenses in celebrating wedding occasions like making your own wedding souvenir. Materials in making souvenirs is also expensive but you can make a solution for this by making wedding souvenirs using recycled materials. Now I want to share another DIY craft. another way to recycle an old news paper. This tutorial is best for students in elementary and high school who are seeking ideas for their school projects. This procedure is very easy that even kids can follow the instructions on how to make a little cute basket best for souvenir items as wedding souvenirs.
Materials needed are:
  •  old news paper
  •  glue
  •  scissor
  •  ribbon

 Procedure:


For weaving procedure, twist the previous cut news paper like what you see on the picture.


diy recycling news paper to wedding souvenir


  • Cut  the news paper lengthwise about  2 inches wide each.
  •  Fold the news paper 4 times to achieve a half inch width.
  •  Form the folded papers like this and attach the center with glue.
  •  Weave the twisted paper on a circular direction like this.
  •  Make a basket with a height of 2 inches or approximately 5 rounds.
  •  Cut the excess papers except for the two sides because from those, we will form a handle.
  •  Fold and weave the excess paper using a scissor or other flat stick.
  •  This is the result of steps 1-9
  •  Connect the two sides to form a handle by using a glue.
  •  Insert a twisted paper on a side of our handle and glue to lock.
  •  Coil around to cover the handle
  •   Varnish the basket to make it glossy and nice.
  •  Add a ribbon and we're done with our wedding souvenir.


DIY Tote Bag from Used Old Clothes

used clothes recycled to shopping bag

Today's generation, when plastics are strictly prohibited in department stores, learning how to make your own shopping bag or tote bag is a perfect timing. This kind of tote bag is best designed for shopping and this is another helpful tip for elementary and high school students for their school projects . You can fold it, and insert it in your hand-bag so whenever or wherever you think you need to shop, you don't have to buy a shopping bag or a paper bag because you can carry this bag anytime, anywhere. You don't have to buy a new cloth for this project, since my blog's theme is How to Recycle Wastes to Handicraft, the materials we are going to use are all recycled or already used.

diy recycling used clothes to shopping bag
These are the materials I used with this project, The blue printed cloth which was my favorite skirt and the red plain remnants of cloth for lining which was also a lining of my old skirt..


diy recycling used clothes to shopping bag

This is the hip part of my old pants years ago.


diy recycling used clothes to shopping bag

We're going to attach them together. You have to cut the connect point of the skirt the same curve of the pants so it will fit properly. Sew to attach them together.


diy recycling used clothes to shopping bag
I made these straps for the handle. We're just going to attach them to our bag like this...


diy recycling used clothes to shopping bag
Our finished product


You may also like these articles:

DIY Make a Mini Reversible Tote Bag using remnants of cloth and used old clothing


<img src="reversible.gif" alt=" procedure in making reversible tote bag out of retaso" />
This is the reversible mini tote bag  project that I'm going to teach you this time, a simple DIY craft to be added to your hobbies. You see, I used blue and orange printed remnants of cloth. This product is best as present, token, souvenir or school project for elementary and high school students. The procedure on how to make your own mini reversible tote bag is very easy, all we need are:

diy bag
Colorful remnants of cloth


A piece of long cloth for our ribbon chord. Provide another color of cloth for the strap or handle.


Stitch or sew both sides of our square-cut cloth like what you see on the picture.


Reverse one of our square cut cloth...


...and make this one opposite.


Insert  the reversed cloth into the other cloth like this


Make sure that you left a hole on both sides of one of the squares. This is where we will insert the ribbon chord.


Now, sew or stitch the mouth of our mini bag like this. You have to fold them both inside when stitching, this is to prevent ripping.


If you see the thread lines, I did 3 lines: top, middle and bottom. Between the middle and the bottom is where our ribbon chord  will  be placed.


Insert the chord for the ribbon.


This is how will it look like.


Add handles. This is the front of our bag. I


If you reverse it, this is how will it look like....


Now, we're done with the reversible mini tote bag. It's so easy, you can do it by manual stitching or by sewing.


You may also like these articles:


How to Make Pot Holders (kitchen rags) from old recycled clothes


If your problem is a bulk of remnants of cloth in your drawer and you can do nothing with them than stock them and let occupy o lot of space in your home, then this project could be a solution to your problem, the DIY craft procedure on How to Make Pot Holders. Our kitchen is where moms are most of the time. As I always say "my favorite hang-out". Did you ever experience running out of pot holder in your kitchen? Pot holder seems to be nothing, but it plays a very important role in our kitchen when doing our kitchen chores...it protects our hands from heat and dirt. Pot holder is our hands' best-friend!
Now I want to show you how to make a pot holder or kitchen rags using used old clothes and remnants of cloth. This one is another way to recycle waste materials like used old clothing or remnants of cloth.
These are the materials I used with this project:


used clothing, cut into squares


remnants of cloth


The procedure in making pot holders is very simple when you know how to stitch.


Step 1: You see our remnants of cloth above (white) I laid over the three layers and sew it, I attached the two parts of the printed cloth together and sew it to form a square. This will be the top of our pot holder.


Step 2: Cut a 2 inch thick cloth, the length should be equal to the size of our square-cut used cloth.This will serve as our edging.


Step 3: Sew the 2 inch, long cloth to our square-cut used cloth like this.


Step 4: This is the back of our pot holder. We have to fold the edges to prevent it from ripping.


Step 6: Sew the edges of our pot holder.


This is the result following the procedures 1-6


And this is the back of our pot holder


Step 7: Now let's put a holder so we can hang our pot holder.


Step 8: Sew it again in "X" directions.


<img src="pot holder.gif" alt=" procedure in making pot holder out of remnants" />
This is our finished product.

This project can benefit plain house-wives by minimizing the wastes and a bulk of remnants and by saving money buying rugs. It can also benefit house wives seeking business idea to earn an extra income by making pot-holders and selling them to the market.I hope I made this tutorial on how to make a pot holder clear and helpful because I really want to share and help moms like me to simply manage wastes properly and make a living out of the garbage.


Random Posts

Blogger Tips and TricksLatest Tips And TricksBlogger Tricks